
Removing window tint can be a daunting task, especially if you’re worried about leaving behind a sticky residue. Whether you’re looking to update your home’s aesthetic or improve energy efficiency with new window treatments, knowing how to effectively remove old window tint is essential. In this guide, we’ll explore practical steps to remove window tint without leaving residue, ensuring a clean and clear surface ready for your next project.
Window tint removal requires a combination of the right tools, techniques, and patience. Without proper guidance, you might end up with scratched windows or stubborn adhesive that refuses to budge. Understanding the composition of window tint and its adhesive properties can help you tackle the removal process more efficiently. This knowledge will not only save you time but also prevent potential damage to your windows.
Why Remove Window Tint?
Window tints are popular for their ability to reduce glare and block harmful UV rays, enhancing both comfort and privacy. However, over time, they can become damaged or outdated, necessitating removal. Whether it’s for aesthetic reasons or to improve energy efficiency with new options, removing old tint is often the first step in updating your windows.
As window tints age, they may begin to peel, bubble, or discolor, detracting from the overall appearance of your home or vehicle. Additionally, advancements in tint technology mean newer films offer better performance in terms of UV protection and energy efficiency. By removing old tint, you pave the way for these modern benefits, ensuring your space remains comfortable and stylish.
Step-by-Step Guide to Removing Window Tint
Removing window tint involves a careful process to ensure that both the film and adhesive are completely eliminated. Here’s how you can do it:
Gather Your Tools
Before starting the removal process, it’s important to gather the necessary tools. You’ll need:
- A spray bottle filled with soapy water or ammonia-based cleaner
- A utility knife or razor blade scraper
- A hairdryer or heat gun
- Microfiber cloths
- Paper towels
- A plastic bag or garbage bag
- Non-abrasive sponge
Having the right tools on hand is crucial for a smooth tint removal process. A utility knife or razor blade scraper is essential for lifting the edges of the film without scratching the glass. The hairdryer or heat gun will be your best friend in softening the adhesive, making it easier to peel away the film. Additionally, microfiber cloths and non-abrasive sponges ensure the glass remains scratch-free during the cleaning process.
Step 1: Soften the Adhesive
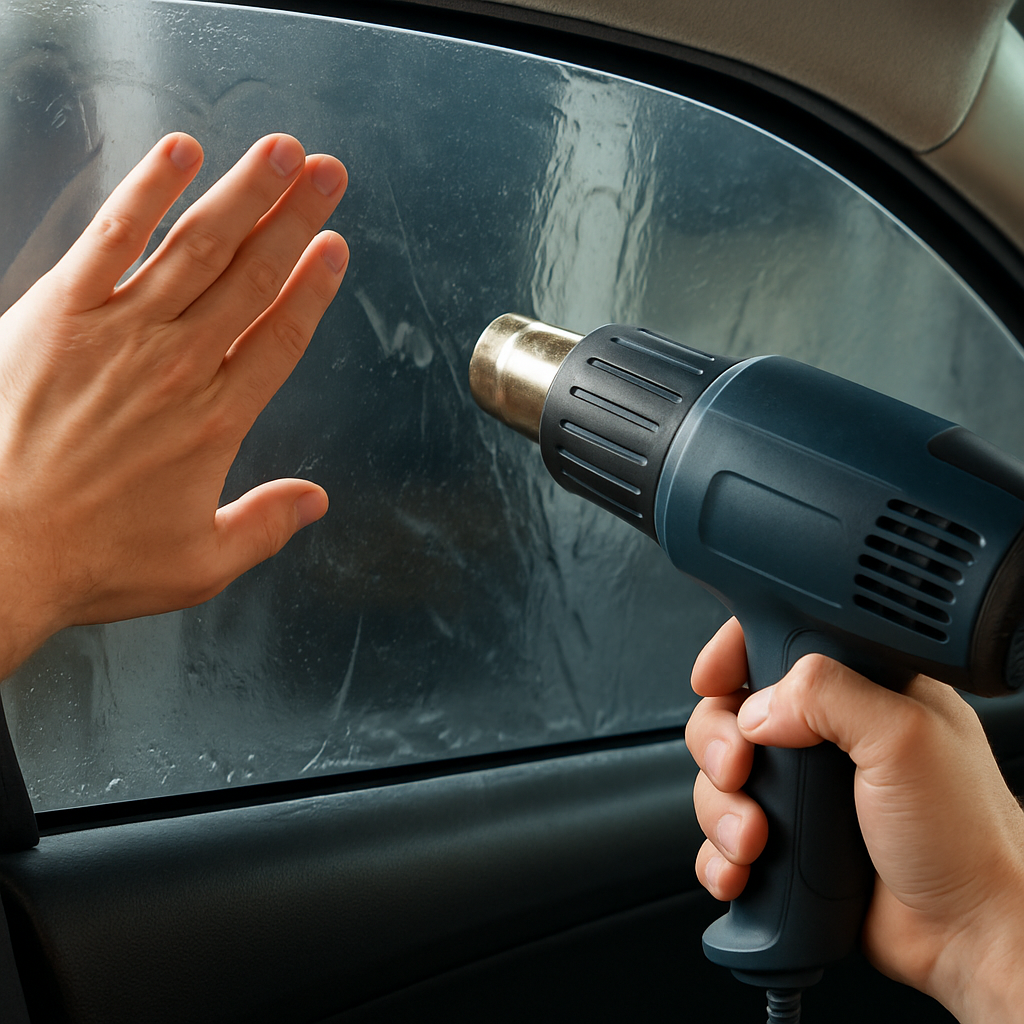
The first step in removing window tint is to soften the adhesive that holds it to the glass. You can achieve this by using a hairdryer or heat gun. Hold the dryer about two inches from the window and move it slowly across the surface to evenly heat the tint. This process will make it easier to peel away the film.
Heating the tint not only makes the adhesive more pliable but also reduces the risk of the tint tearing during removal. It’s important to apply the heat evenly, ensuring all areas of the tint are properly warmed. Be cautious not to overheat the glass, as this could lead to cracking or damage. The key is to strike a balance between softening the adhesive and maintaining the integrity of the window.
Step 2: Peel Away the Tint
Once the adhesive is softened, use a utility knife or razor blade scraper to lift a corner of the window tint. Be careful not to scratch the glass. Slowly peel the tint away from the window, applying heat as necessary to keep the adhesive soft. If the tint tears, simply start peeling from another corner or edge.
Taking your time during this step is essential for preventing tears and ensuring a clean removal. As you peel, continue to apply gentle heat to areas where the adhesive feels particularly stubborn. If you encounter resistance, don’t force the tint; instead, reapply heat and attempt to peel from a different angle. This methodical approach minimizes the risk of damage and ensures a smooth removal process.
Step 3: Remove Any Residual Adhesive
After the tint film is removed, you’ll likely find adhesive residue on the window. To remove this, spray the glass with soapy water or an ammonia-based cleaner. Allow it to sit for a few minutes to further soften the adhesive. Then, use the razor blade scraper or a non-abrasive sponge to gently scrape away the residue. Wipe the area with a microfiber cloth as you work.
Residual adhesive can be tricky to remove, but patience is key. Allowing the cleaning solution to sit on the residue softens it further, making it easier to scrape away. Use gentle, consistent pressure with the razor blade or sponge to avoid scratching the glass. Regularly wiping with a microfiber cloth ensures the window remains clean and free from streaks as you work.
Step 4: Final Cleaning
Once all the adhesive is removed, clean the window thoroughly with a glass cleaner and a microfiber cloth. This will ensure there are no streaks or leftover residue, leaving the surface ready for new treatments.
A final cleaning not only enhances the appearance of your windows but also prepares them for new tint application. Inspect the glass for any remaining adhesive or streaks, addressing these areas with additional cleaning as needed. A spotless window surface ensures the best possible outcome for any subsequent treatments or tints you choose to apply.
Tips for Successful Tint Removal
Removing window tint can be straightforward if you follow these tips:
- Work Slowly: Rushing can lead to tears in the film and missed adhesive spots.
- Use Proper Tools: A high-quality razor blade scraper is essential for removing adhesive without damaging the glass.
- Apply Heat Evenly: Consistent heat application will make peeling the tint much easier.
- Be Patient: Adhesive removal can be tedious, so take your time to ensure a clean finish.
In addition to these tips, it’s important to maintain a clean workspace to avoid introducing dust or debris to the glass surface. Regularly wiping down your tools and cloths can prevent scratches and ensure a smoother removal process. Moreover, working in a controlled environment, such as a garage or shaded area, can prevent the adhesive from hardening too quickly due to direct sunlight, making your task easier.
When to Call a Professional

by Паша Грановский ([https://unsplash.com/@ad_honores](https://unsplash.com/@ad_honores))
While DIY tint removal is feasible for many, there are times when calling a professional may be beneficial. If you’re dealing with a large number of windows, especially high or hard-to-reach ones, or if you’re unsure about the process, professional services can ensure a residue-free, damage-free result.
Professionals have access to specialized tools and solutions that can make the removal process quicker and more efficient. They also bring expertise to handle any unforeseen challenges, such as particularly stubborn adhesive or delicate glass surfaces. For those who lack the time or confidence to tackle the project themselves, hiring a professional can provide peace of mind and a guaranteed quality finish.
Choosing Your Next Window Treatment
Once your windows are clean and clear, you may want to consider new window treatments. Modern window films offer enhanced UV protection, greater energy efficiency, and improved aesthetics. Here are some factors to consider when choosing new window tint:
Energy Efficiency
Newer films are designed to significantly reduce heat gain, helping to lower your energy bills and improve indoor comfort. Look for tints with high heat rejection ratings and low emissivity.
Incorporating energy-efficient window films can result in substantial savings on your energy bills, especially during peak summer months. These films work by reflecting a significant portion of the sun’s heat away from your home, maintaining a cooler interior environment. When selecting a film, pay attention to its solar heat gain coefficient (SHGC) and emissivity ratings, which indicate its effectiveness in blocking heat and retaining indoor temperatures.
Aesthetic Appeal
Window films are available in a variety of shades and styles, allowing you to customize the look of your home. From frosted to mirrored options, the right tint can complement your interior design while providing the desired level of privacy.
Choosing the right aesthetic can transform the look of your home, adding a touch of elegance or modernity. Consider the existing color scheme and design elements of your space when selecting a tint. Additionally, think about the amount of natural light you wish to allow in, as different shades can affect the brightness and ambiance of a room.
UV Protection
Select a film with high UV protection to protect your furniture, flooring, and artwork from fading. High-quality tints can block up to 99% of harmful UV rays.
UV protection is crucial in preserving the longevity of your interior furnishings. Over time, UV rays can cause significant damage, leading to fading and deterioration. By investing in a high-quality tint, you not only protect your belongings but also contribute to a healthier indoor environment by reducing the penetration of harmful rays.
Durability and Warranty
Choose a product with a strong warranty and proven durability. Quality films are less likely to peel or bubble over time, ensuring long-lasting performance.
Durability is a key factor in the long-term satisfaction of your window tint investment. A robust warranty provides assurance against defects and premature wear, offering peace of mind. Look for films that have undergone rigorous testing and have a track record of withstanding various environmental conditions without compromising performance.
Conclusion
Removing window tint without leaving residue is not only possible but manageable with the right approach and tools. Whether you’re updating your home for aesthetic reasons or seeking improved energy efficiency, a clean window surface is the perfect canvas for new treatments. By following the steps outlined in this guide, you can ensure a smooth and successful tint removal process. For those seeking additional assurance, professional services are always available to provide expert assistance.
As you consider new window film options, remember to evaluate the energy efficiency, aesthetic appeal, UV protection, and durability of each product to find the perfect fit for your home’s unique needs. A thoughtful approach to window treatments can enhance both the functionality and beauty of your space. Happy renovating!